Dewetron AR
| roles | Programmer • Graphic Designer • UI |
| software | Unity Engine • Adobe Photoshop • Visual Studio • Vuforia |
| languages | C# |
| team size | |
| platforms | iPhone • iPad • Android |
Dewetron AR was a small 40 hour freelance contract where I developed a prototype Augmented Reality app as a companion to their Product Guidez. Specifically, they wanted it to be done by their next event to present. The App features camera-based AR targeting and a custom PDF Reader, to give the app more appeal when users wanted to look at products directly through the app. I used Vuforia to create a target database, and implemented it into a Unity based AR project. I developed the PDF reader to user Zoom and Swipe controls. Please enjoy the video below to view all of the app's features.
The AR Target Database
I used Vuforia as an AR database based on what the specifications for the project were. It turns out Vuforia is a relatively streamlined project. I added the appropriate targets the client wanted from their Product Guide. There was some Photoshop work involved, due to fact that the AR targeting doesn't play well without a variety of contrasting imagery. Stylistically, the Guide is primarily white, with just a small amount of contrasting greys.
It was my first experience in an AR environment, and an interesting learning experience using Vuforia as a starting place
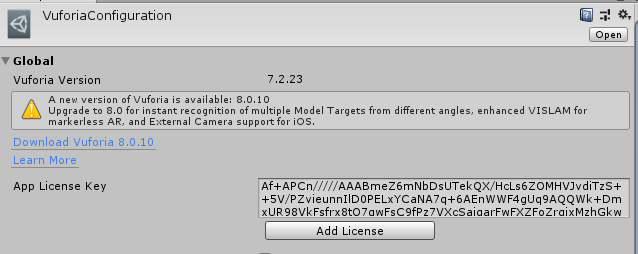
There's a bit of setup that needed to go into Vuforia AR. It requires a bunch of Vuforia-specific components in the Scene. In addition, it needs your Database's License Key to gain access to the AR Targets.
The VuforiaConfiguration is just a Configuration Asset in the Project Folder where you enter in some information about how to interact with AR Targets. It is also where you paste the License Key to access the Database
Vuforia Components
A deep-dive into the Documentation explained a bit about the requirements with AR Image Targeting. You build an AR Target with a few Components.
- The Image Target Behaviour Component accesses the Database and where you choose a target to detect
- Default Trackable Event Handler Is the script that performs the intended video to begin playing on a game object.
- This Event Handler was one of the components that needed to be edited to have player reset when tracking is lost, per client's request
- Note that when adding a target to the database, a weight needs to be assigned (in video above). This correlates to the intended width the object will be in units (Meters in Unity).
- You need to make sure you set the height of an Image Target relative to the unit width and the target dimensions ratio
- If Unit width = 1 and image scale = 1920 x 800, the unit ratio = 1 x 0.41667
The General Setup in a target Image Gameobject

The GameObject that has the Video Component needs to be placed in the desired position, relative to where the image target is. I parented the GameObject to the Image target and set its local position to zero.
The Quad with the video player is invisible until the Event Handler tells it to play
The final result shows the video is positioned precisely on top of the target image
After some research, it became apparent that Apple Devices don't have a variety of PDF reader plugins like Android Devices. So I created my own. Programming the PDF Reader took a good chunk of the agreed paid hours, but works as intended and was designed to be easy to use if the application is expanded on.
Some of the features

- Horizontal and Vertical Viewing Modes, with auto-scaling pages
- Pinch-To-Zoom
- Swipe to turn a page
The PDF Controller is built to take images as a List to traverse through. There are no dependencies , so it could be used in any project that requires PDF Readers
Auto Scaling Images
Properly scaling the pdf pages to fit perfectly on screen took a bit of work. For 2 reasons:
-
The First and Last Pages only display a single page, while the rest are 2 pages.
- This means comparing width and height to see which is greater.
- Adjust the width or height to fit to the edge of that screen's width or height
- If Adjusting Width, set it to fit the screen width, regardless of size.
-
With the width set, compare the image and screen height
- If the image height is greater than the screen height, size the image to fit by height.
- Resizing the image is done by subtracting the the image's current scale and the difference in percent between the screen height and image rect height
Notice that changing orientation resizes the image to fit the screen ratio. Without rescaling, The first page's height would start outside of the screen's height
The implementation of Scale to Fit. It is called when orientation changes and the Swipe() function
void Swipe()
{
    //Move forward if swiping left and not at end of PDF
    if (previousPosition.x < startPosition.x & currentPage < pageList.Count)
            image.sprite = pageList[++currentPage];

    //Move Backward if swiping right and not at beginning of PDF
    else if (previousPosition.x > startPosition.x & currentPage > 0)
            image.sprite = pageList[--currentPage];

    //Move image to center position
    currentRect.localPosition = Vector3.zero;

    //Fit image within screenspace
    ScaleToFit();
}

void ScaleToFit()
{
    //image.SetNativeSize();  //Reset scale

    //Check PFD Ratio for the bigger ratio
    if (currentRect.rect.width > currentRect.rect.height)
    {
        //Adjust the scale relative to the difference between the rect's width and screen width
        currentRect.localScale = Vector3.one * (Screen.width / currentRect.rect.width);

        //The image's top and bottom are outside of the screen height
        if(currentRect.rect.height * currentRect.localScale.y > Screen.height)
        {
            //Set the adjusted height percentage
            float scaleHeight = Screen.height / currentRect.rect.height;

            currentRect.localScale -= Vector3.one * (currentRect.localScale.y - scaleHeight);
        }
    }
    else
    {
        currentRect.localScale = Vector3.one * (Screen.height / currentRect.rect.height);

        if (currentRect.rect.width * currentRect.localScale.x > Screen.width)
        {
            float scaleWidth = Screen.width / currentRect.rect.width;

            currentRect.localScale -= Vector3.one * (currentRect.localScale.x - scaleWidth);
        }
    }
}

//Changed screen orientation
void CheckForNewOrientation()
{
    if(Screen.orientation != orientation)   //Current Orientation has updated
    {
        ScaleToFit();
        orientation = Screen.orientation;
    }
}
Pinch To Zoom
By contrast of calculating the auto-scaling, pinch to zoom is much simpler, just taking the differences in dual finger movement every frame
- Get each fingers movement difference from last frame
- Both finger values are converted to magnitude
-
The difference in magnitudes is added to the current image's scale, by a factor of the zoom's speed
- If both fingers move closer together, the movement is negative and zooming out
- Else movement is positive and zooming in
//When one of the bounds is at its end, stop moving in that axis
Vector2 GetBoundedMovement(Vector2 direction)
{
    if (StopMovementOnXAxis(direction.x))
        direction = new Vector2(0, direction.y);

    if (StopMovementOnYAxis(direction.y))
        direction = new Vector2(direction.x, 0);

    return direction;
}

//Pinch Zoom Scaling
void Zoom()
{
    Touch first = Input.GetTouch(0);
    Touch second = Input.GetTouch(1);

    Vector2 firstPrev = first.position - first.deltaPosition;       //Last position of first finger
    Vector2 secondPrev = second.position - second.deltaPosition;    //Last position of second finger

    //The comparers in the amount of movement in magnitude
    float currentTouchMagnitude = (first.position - second.position).magnitude;
    float previousTouchMagnitude = (firstPrev - secondPrev).magnitude;

    //Get the movement magnidude's difference
    float difference = currentTouchMagnitude - previousTouchMagnitude;

    //Scale up/down image
    currentRect.localScale += (Vector3.one * difference) * zoomSpeed;

    //Maximum Scale
    if (currentRect.localScale.x > 2)
        currentRect.localScale = Vector3.one * 2;

    //Scale to ensure that scaling stays at least the size of screen
    if (currentRect.localScale.x * currentRect.rect.width < Screen.width &
        currentRect.localScale.y * currentRect.rect.height < Screen.height)
        ScaleToFit();
}
Main Menu and The Canvas
UI for Mobile was another first for me. There's a lot to consider with such varying UI screen spaces. And stylistically, anchoring the UI to a specific place didn't make sense. In vertical view, The UI Buttons are placed in the middle. To lock the anchor positions in the same place would have led to extremely wide and unappealing buttons when in horizontal orientation.
My solution was creating 2 versions of the Main Menu as separate Canvases; Quicker to code and design on a deadline, and the resource requirements were negligable.
Captured on iPhone X


Portrait
LandScape
The Code is a matter of toggling both canvases when the orientation changes
Hamburger Menu
A version of the Hamburger UI is nested in the Horizontal and Vertical Canvases On click, It slides into view and ends at a percent of the orientation width. Closing brings it back to its original position. Each Button performs similar functions to the Main Menu items.
Implementation of the Open and close position. Whenever Orientation changes, the TrackOrientation method updates the open and close positions. Open and Close methods run as separate threads.
void TrackOrientation()
{
    //Set new  Starting Position
    closedPosition = Screen.width;

    //Set New End Position
    openedPosition = (closedPosition + ((buttonRect.rect.width * buttonRect.localScale.x) * 2)) - Screen.width;

    menu.transform.position = new Vector3(closedPosition,
    menu.transform.position.y, 0);

    orientation = Screen.orientation;
}

public void OpenCloseHamburger()
{
    if (hamburgerIsOpen)
        StartCoroutine(closeHamburger);
    else
        StartCoroutine(openHamburger);
}

IEnumerator OpenHamburger()
{
    StopCoroutine(closeHamburger);  //So Open and close threads don't overlap
    closeHamburger = CloseHamburger();  //Set new routine for new function call

    RectTransform menuRect = menu.GetComponent<RectTransform>();

    //Set Destination to End Position
    Vector2 destination = new Vector2(openedPosition, menuRect.position.y);

    while (Vector2.Distance(menuRect.position, destination) > 1)
    {
        yield return new WaitForEndOfFrame();

        //Move towards destination
        menuRect.position = Vector2.Lerp(menuRect.position, destination, Time.deltaTime * 10f);
    }

    menuRect.position = destination;    //Set to destination
    hamburgerIsOpen = true;

}

IEnumerator CloseHamburger()
{
    StopCoroutine(openHamburger);   //So Open and close threads don't overlap
    openHamburger = OpenHamburger();    //Set new routine for new function call

    RectTransform menuRect = menu.GetComponent<RectTransform>();

    //Set Destination to Default Position
    Vector2 destination = new Vector2(closedPosition, menuRect.position.y);

    while (Vector2.Distance(menuRect.position, destination) > 1)
    {
        yield return new WaitForEndOfFrame();

        //Move towards destination
        menuRect.position = Vector2.Lerp(menuRect.position, destination, Time.deltaTime * 10f);
    }

    menuRect.position = destination;    //Set to destination
    hamburgerIsOpen = false;
}
Product Links
Part of the UI involved allowing users to access web urls from the App. With the links provided, I had a click event for each of the buttons to open url with a string. It's a tiny piece of code, called from the Click Event
The Parameter in the Unity editor is a string, and it should be the URL to a webpage

The Method used is just using the OpenUrl method.
public void OpenURL(string url) { Application.OpenURL(url); }
Contact Dewetron
Contact also uses the OpenUrl(string) method, however, the email infomation is hardcoded into the MenuManager class. In the On Click () button event, The Email() method is called. The email function includes the address, subject, and body
void InitializeEmailURL()
{
    string emailAddress = EscapeURL("ContactMe@dewetron.com");
    string emailSubject = EscapeURL("AR Connection");
    string emailBody =  EscapeURL(
        "I would like to know more about DEWETRON products! \n\n" +
        "Please contact me using the email address identified in this response.\n\n" +
        "You may also contact me using the following phone number:\n\n" +
        "With this response, I am giving you permission to contact me about DEWETRON products and services.\n\n" +
        "Thanks\n\n");

    emailUrl = "mailto:" + emailAddress + "?subject=" + emailSubject + "&body=" + emailBody;
}

public void Email() { OpenURL(emailUrl); }

string EscapeURL(string url)
{
    return WWW.EscapeURL(url).Replace("+", "%20");
}